Point-to-Point
Point-to-Point Wireless Bridge
A pair of directional radios, one on each building. The default answer for distances where running a cable is impractical.
A point-to-point (PtP) wireless bridge is a pair of directional radios, one mounted on each building, doing nothing except carrying ethernet between them over the air. It's the default answer for outbuilding internet when trenching isn't practical and there's a clear line of sight between the two mounting points. Typical home installs cover 50 ft to 1,500 ft and deliver 300–1,000 Mbps of usable throughput.
This guide covers how it works, the gear to buy (with options for every budget), and — below — a shopping-list checklist that adapts to what you already own.
Is point-to-point right for you?
- Distance between buildings is 50 ft to ~1,500 ft
- You have (or can create) clear line of sight between the two mounting points
- You want at least 100 Mbps actually delivered to the destination
- Digging a trench isn't practical (landscaping, rock, rental, utilities in the way)
- Existing coax runs between the buildings → use MoCA instead — it's simpler and doesn't need line of sight.
- Under ~75 ft with existing conduit → direct-burial ethernet is cheaper and bulletproof.
- No line of sight at any practical mounting height → direct-burial fiber or cellular are your options.
Pick your radios (choose one tier)
The radios are the one thing you'll definitely buy. Everything else is situational. We default to Ubiquiti / UniFi — the best-supported ecosystem, huge install base, and the gear a professional WISP installer would put up.
Budget UniFi — LiteBeam 5AC Gen2 2-Pack
Cheapest legitimate UniFi option. 23 dBi dish antennas, bundled with two Ubiquiti surge protectors in this listing. Plenty for a home internet connection with clear line of sight up to ~5 km.
Ubiquiti LiteBeam 5AC Gen2 (LBE-5AC-Gen2), 2-Pack w/ Surge Protectors
Cheapest legitimate UniFi PtP pair. Dish form factor, 23 dBi gain.
Entry-level airMAX dish radio. 23 dBi gain at a price below the NanoStation. Not as fast or as well-specced as the NanoBeam, but plenty for a home internet connection. This listing bundles 2 units and 2 Ubiquiti Ethernet Surge Protectors — the most cost-effective way to buy a complete UniFi PtP kit.
Best for: Budget UniFi install up to ~5 km with good line of sight.
- Cheapest UniFi-ecosystem PtP
- Surge protectors included
- Good gain for the price
- Older chipset than NanoBeam
- Single-chain radio
- Band
- 5 GHz
- Gain
- 23 dBi
- Range
- Up to 5 km
- PoE
- 24V passive (included)

Standard — NanoStation 5AC Loco 2-Pack
The most-installed PtP radio in the world. If you asked ten WISP installers, nine would say NanoStation Loco. Runs airMAX, includes mounts and PoE injectors in the 2-pack. Ideal for most residential barn / shop / ADU installs under 1,500 ft.
Ubiquiti NanoStation 5AC Loco (NS-5ACL), 2-Pack
The default UniFi point-to-point pick. One box, both ends.
The most-installed outdoor PtP radio in the world. Two of them create a dedicated wireless bridge between buildings. Small, weatherproof, 24V passive PoE. Real-world throughput ~300–450 Mbps with clear line of sight. The 2-pack ships with both ends, mounts, and injectors.
Best for: Most house-to-barn / house-to-shop installs under 1500 ft.
- Proven, huge install base, tons of community support
- airMAX config is well-documented
- Both units + mounts + PoE injectors in one box
- Requires clear line of sight
- 24V passive PoE (not 802.3af)
- Band
- 5 GHz
- Gain
- 13 dBi
- Range
- Up to 1.5 km
- PoE
- 24V passive (included)

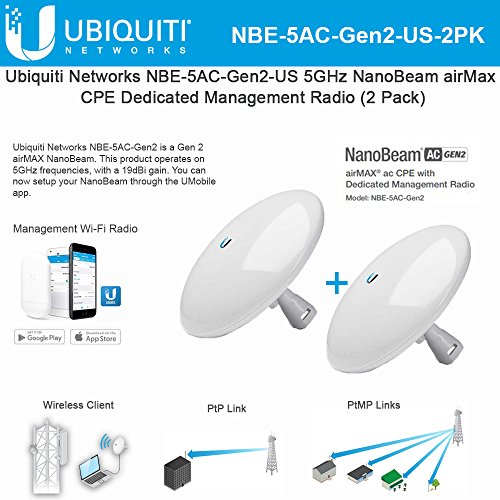
Step-up — NanoBeam 5AC Gen2 2-Pack
Dish-style with 19 dBi gain and a dedicated management radio. Noticeably better throughput and stability at longer distances or in noisy RF environments (suburbia, competing 5 GHz links). Same configuration workflow as the NanoStation.
Ubiquiti NanoBeam 5AC Gen2 (NBE-5AC-Gen2), 2-Pack
Step up when you need more reach or cleaner signal.
Dish-style airMAX radio with 19 dBi gain and a dedicated management radio. Noticeably better throughput and stability than the Loco at longer distances or in noisy RF environments. Same configuration workflow as the NanoStation.
Best for: Runs from 500 ft to ~3 miles, or anywhere with heavy Wi-Fi interference.
- Higher gain = more margin for rain/foliage
- Dedicated management radio
- Gigabit PoE port
- More expensive per pair
- Narrower beam — aiming matters more
- Band
- 5 GHz
- Gain
- 19 dBi
- Range
- Up to ~15 km
- PoE
- 24V passive (included)
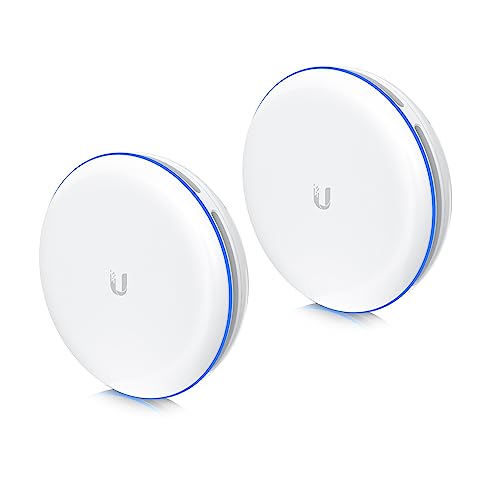
Plug-and-play — UBB-XG 10 Gbps Bridge
The premium option. Pre-paired out of the box — mount them, point them at each other, plug them in. 10 Gbps throughput over 60 GHz. No airOS, no channel hunting. Trade-off: shorter distance limit (~500 m) and more weather sensitivity than 5 GHz.
Ubiquiti UniFi UBB-XG Building-to-Building Bridge (2-Pack)
Plug-and-play 10 Gbps 60 GHz bridge. The easiest possible install.
The premium option. Both units are paired out of the box — mount, point them at each other, plug them in. No airOS config, no SSID, no channel hunting. 60 GHz delivers true 10 Gbps short-range links. UniFi-managed once online. Shorter distance limit (~500 m) and more sensitive to rain/obstructions than 5 GHz radios — strictly line-of-sight.
Best for: When you want it to 'just work' and distance is under 500 m.
- Zero configuration
- 10 Gbps throughput
- Integrates with UniFi controller
- Most expensive option
- Tighter distance limit than 5 GHz
- 60 GHz is more weather-sensitive
- Band
- 60 GHz
- Throughput
- Up to 10 Gbps
- Range
- ~500 m
- PoE
- 802.3bt
Non-UniFi alternative — TP-Link CPE510
Cheaper per radio, sold as single units. Pharos OS is simpler than airOS for first-timers. Buy two identical units.
TP-Link CPE510 (5 GHz, N300)
Budget 5 GHz PtP CPE. Cheaper than UniFi, slower, easier to set up.
5 GHz outdoor CPE with 13 dBi gain. Real-world throughput ~150 Mbps. Solid middle ground if you want 5 GHz but don't want to pay Ubiquiti prices. Sold per unit — buy two for a point-to-point. Pharos OS is more approachable than airOS for first-timers.
Best for: Budget 5 GHz links where UniFi is overkill or over-budget.
- Cheap per unit
- 5 GHz band
- Simple Pharos UI
- Buy two separately
- Older chipset
- Max ~150 Mbps real-world
- Band
- 5 GHz
- Gain
- 13 dBi
- Range
- Up to 15 km
- PoE
- Passive (included)

Don't mix radio models between ends. It can be made to work with tuning but has no upside and many headaches. Buy a 2-pack, or two of the same single unit.
Build your shopping list
Beyond the radios, you need a few more things — some only if you don't already have them. Check off what you own.
Build your shopping list
Check off what you already own — we'll tailor the list to what's left.
Still need to buy(6 items)


Prices are approximate. As an Amazon Associate we earn from qualifying purchases.
Install: step by step
1. Pick your mounting points
Stand at each potential mounting location and look toward the other building. If you can't see the other mounting point clearly with your eyes, the radios won't see it either. Tree branches that are bare in winter will be a solid obstruction with leaves on — plan for worst case.
For links over 500 ft, mount as high as practical. Height buys signal margin.
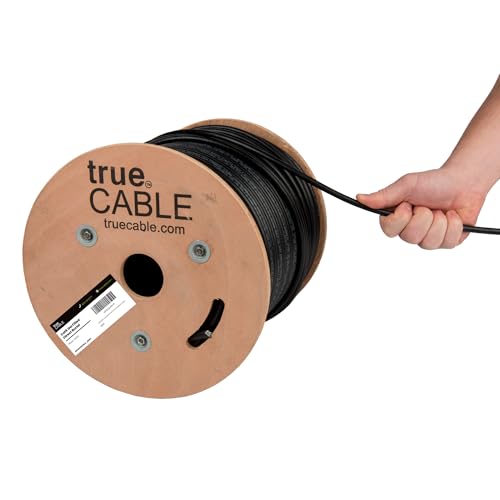
2. Plan the cable runs
- Ethernet has a hard limit of 328 ft (100 m) from radio to switch. Past that, add a switch or repeater.
- Use outdoor-rated, UV-resistant cable outdoors. Indoor cable cracks in a year of sun.
- Direct-burial / gel-filled cable for unprotected underground runs. Otherwise, use conduit.
- Drip-loop the cable where it enters the building so water runs off instead of tracking in.
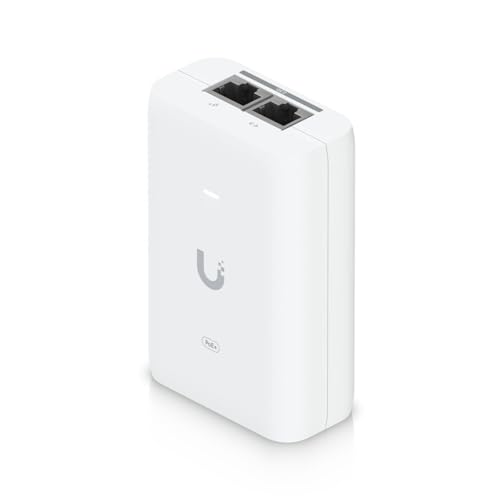
3. Install surge protectors
Mount a surge protector where each cable enters each building. Ground it to the building's ground system — the surge protector does nothing ungrounded.
4. Mount and terminate the radios
Get the outdoor rubber boot on the cable before crimping. Seal every outdoor RJ45 with the boot that ships with the radio.
5. Configure the link
Skip this step on the UBB-XG (pre-paired out of the box). For NanoStation / NanoBeam / LiteBeam:
- Plug each radio into your laptop, set an admin password, update firmware, assign a static IP on your home subnet.
- Set the far-end radio (destination building) to Access Point mode with WDS enabled. Pick a quiet 5 GHz channel via Site Survey. Give it an SSID and WPA2 password — just for the bridge, nobody else sees it.
- Set the near-end radio (house) to Station mode with WDS enabled. Point it at the far-end SSID, enter the password.
- Verify link. RSSI of -65 dBm or better = solid. -75 or worse = aim or obstruction problem.
6. Aim
Loosen the mount, pan slowly while watching the signal meter, tighten when signal peaks. On the NanoStation Loco you can often eyeball it. On the NanoBeam / LiteBeam you need the alignment tool — the beam is narrower.
Put one phone on FaceTime with someone at the other radio. They read the dB while you pan. Saves a lot of ladder trips.
7. Plug it in
- House radio ethernet → LAN port on your router (not WAN — you're extending the LAN).
- Destination radio ethernet → switch uplink or straight to the AP.
- Destination AP SSID = same as your house Wi-Fi for seamless roaming.
What good looks like
- Throughput at the destination: within 10–20% of wired-at-the-house throughput.
- Ping from destination to house: single-digit milliseconds.
- RSSI: -65 dBm or better, stable over days.
- No drops from cars driving past, doors opening, or light rain.
Troubleshooting
Link up, speeds terrible. Channel interference — run Site Survey, move to a quieter channel.
Link unstable in bad weather. On the edge of your signal budget. Aim better, raise one end, or upgrade to a higher-gain radio.
One radio won't respond. PoE. Wrong voltage bricks airMAX radios (they want 24V passive — a random 48V PoE switch will kill them). Check the injector that came in the box and the pinout.
Works cool, drops when hot. Marginal cable crimp (thermal cycling) or radio in direct sun on a black wall.
Can't see the other building for trees. Raise above the tree line, prune, or use a no-line-of-sight solution (MoCA, buried fiber).
Where this fits
- House → BarnSecurity cameras, smart feeders, streaming in the tack room — here's how to get real internet into a barn.
- House → ShopCNC control, network-licensed software, shop cameras, and a Bluetooth speaker that actually works.
- House → ADUAccessory dwelling units need real, reliable internet — not a flaky Wi-Fi extender. Do it right.
- House → ShedShe-shed, man-cave, backyard office — get Wi-Fi out there without burying a cable.
- House → GarageEV charger data, garage cameras, and a network drop for the guy working on the car.
- House → OutbuildingThe catch-all — workshops, sheds, pump houses, anything that isn't the main house.
- House → Another BuildingDecision framework for connecting any two buildings — indoors, outdoors, same property or across a road.
- House → FarmWhole-farm networking — barns, arenas, pastures, pole barns. Hub-and-spoke point-to-multipoint + outdoor APs.
- House → FieldPump controls, irrigation, gate openers, livestock cameras — Wi-Fi and network where there's no building.
- House → WorkshopEnough bandwidth for tool downloads, video reference, and a shop camera or two.
- House → Pool HouseMusic, streaming, and pool automation for a building that's right there — but just too far for Wi-Fi.
- House → Guest HouseReal Wi-Fi for guests or renters — not a shared SSID from the main house that drops every thirty feet.
- House → Tiny HouseTiny footprint, real internet. Often the simplest install on this list.
- House → CabinWhen the cabin's too far for cable but you want more than your phone's hotspot — long-range point-to-point or cellular.
- House → GreenhouseClimate sensors, automated vents, and grow-cam streaming. Typically short range and tolerates humidity-rated gear.
- House → CoopPredator cams, automatic doors, and a temperature alert so the flock survives a power outage.
- House → Backyard OfficeWork-from-home, but further. Prioritize latency and upstream bandwidth for video calls.
- House → DockShoreline Wi-Fi for the boat, the dock cam, and anyone actually fishing rather than scrolling.
- House → RV PadFor the guest rig parked out back, or your own full-timer setup.
- House → StudioArt, music, or recording — enough throughput for cloud backups and collab sessions.
- Building ↔ BuildingLink two offices, warehouses, or shops across a street or parking lot without a WAN circuit.