How to Get Internet From Your House to Your Barn (Point-to-Point Guide)
Step-by-step guide to bridging internet from your house to a barn using point-to-point wireless. UniFi-first gear picks, install, aiming, and Wi-Fi for the barn.
If your barn is more than ~75 ft from your house, your existing Wi-Fi almost certainly won't reach it reliably. A mesh node extending into the barn will usually connect, then drop every time someone opens the barn door or a horse walks past the window. The fix is a dedicated wireless bridge — a pair of directional radios, one aimed at the other, doing nothing but moving internet between the two buildings.
This guide walks through a typical house-to-barn install using point-to-point (PtP) wireless: what to buy, how to mount it, how to aim it, and how to turn the ethernet cable at the barn end into good Wi-Fi inside the barn. We default to Ubiquiti / UniFi gear throughout — it's the best-supported ecosystem for this kind of install, and the single app (UniFi Network) will manage everything from the radios to the barn's access point once you're done.
Is point-to-point the right answer?
It's the right answer for most house-to-barn installs, but not all. Quick decision tree:
- Distance between buildings is 50 ft to ~1500 ft
- You have (or can create) clear line of sight between the two mounting points
- You want 100 Mbps or more actually delivered to the barn
- Digging a trench is impractical (landscaping, rock, tree roots, rental property)
- Existing coax between buildings? → MoCA adapter — near-2.5 Gbps over the coax, no line-of-sight needed.
- Under ~75 ft with existing conduit? → Direct-burial Cat6 — cheaper, simpler, faster.
- Both buildings on the same breaker panel and you only need ~50 Mbps? → Powerline adapters — plug-and-play, no drilling.
- No line of sight and too far for other options? → Fiber in conduit is the bulletproof answer. Expensive per foot, but set-and-forget.
How point-to-point works (one minute of theory)
You mount a small radio on the house aimed at the barn, and an identical radio on the barn aimed at the house. The two radios talk to each other on a dedicated wireless link that your phones, your laptops, and your neighbor's Wi-Fi never touch. Each radio has a single ethernet port:
- House radio → ethernet → your home router (LAN port)
- Barn radio → ethernet → a Wi-Fi access point or switch inside the barn
To your network, the whole bridge behaves like a really long ethernet cable. The barn gets its IP address from your home router. Devices in the barn see your home network. Everything you already own keeps working.
The two things that kill point-to-point links:
- Obstructions in the path. Trees with leaves, buildings, metal roofs, silage bags. You need line of sight from radio to radio.
- Bad aim. These radios are directional. "Pointed at the other one" is not close enough — aiming within a degree or two matters for longer links.
Choosing your radios — UniFi tiers
Four UniFi options cover almost every residential barn install. Pick one.
Recommended (~$180 for the pair): NanoStation 5AC Loco 2-Pack
The most-installed PtP radio in the world. If you asked ten WISP installers what to put up between a house and barn, nine would say "NanoStation Loco." The 2-pack includes both radios, mounts, and PoE injectors — one box and you're done shopping for radios.
Ubiquiti NanoStation 5AC Loco (NS-5ACL), 2-Pack
The default UniFi point-to-point pick. One box, both ends.
The most-installed outdoor PtP radio in the world. Two of them create a dedicated wireless bridge between buildings. Small, weatherproof, 24V passive PoE. Real-world throughput ~300–450 Mbps with clear line of sight. The 2-pack ships with both ends, mounts, and injectors.
Best for: Most house-to-barn / house-to-shop installs under 1500 ft.
- Proven, huge install base, tons of community support
- airMAX config is well-documented
- Both units + mounts + PoE injectors in one box
- Requires clear line of sight
- 24V passive PoE (not 802.3af)
- Band
- 5 GHz
- Gain
- 13 dBi
- Range
- Up to 1.5 km
- PoE
- 24V passive (included)

Step-up (~$240 for the pair): NanoBeam 5AC Gen2 2-Pack
If your link is over 500 ft, passes near trees, or you live somewhere with heavy 5 GHz Wi-Fi pollution (suburbia), the extra gain on the NanoBeam gives you a much better margin. Same configuration workflow as the NanoStation.
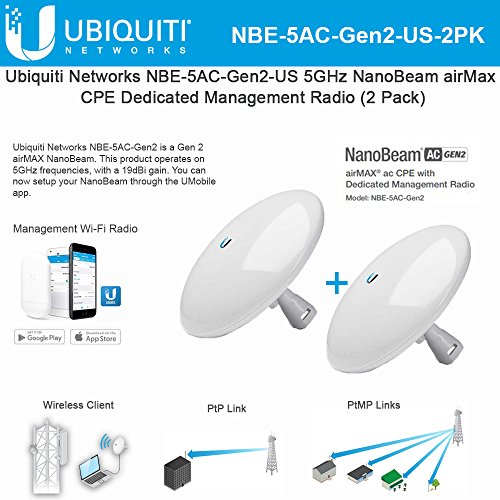
Ubiquiti NanoBeam 5AC Gen2 (NBE-5AC-Gen2), 2-Pack
Step up when you need more reach or cleaner signal.
Dish-style airMAX radio with 19 dBi gain and a dedicated management radio. Noticeably better throughput and stability than the Loco at longer distances or in noisy RF environments. Same configuration workflow as the NanoStation.
Best for: Runs from 500 ft to ~3 miles, or anywhere with heavy Wi-Fi interference.
- Higher gain = more margin for rain/foliage
- Dedicated management radio
- Gigabit PoE port
- More expensive per pair
- Narrower beam — aiming matters more
- Band
- 5 GHz
- Gain
- 19 dBi
- Range
- Up to ~15 km
- PoE
- 24V passive (included)
Budget UniFi (~$160 for the pair): LiteBeam 5AC Gen2 2-Pack
The cheapest legit UniFi PtP option. Dish form factor, 23 dBi gain, and this specific listing bundles 2 surge protectors with it — you're basically getting a complete PtP kit for what a pair of NanoStations costs alone. Older chipset than the NanoBeam, but plenty for a home internet connection with clear line of sight.
Ubiquiti LiteBeam 5AC Gen2 (LBE-5AC-Gen2), 2-Pack w/ Surge Protectors
Cheapest legitimate UniFi PtP pair. Dish form factor, 23 dBi gain.
Entry-level airMAX dish radio. 23 dBi gain at a price below the NanoStation. Not as fast or as well-specced as the NanoBeam, but plenty for a home internet connection. This listing bundles 2 units and 2 Ubiquiti Ethernet Surge Protectors — the most cost-effective way to buy a complete UniFi PtP kit.
Best for: Budget UniFi install up to ~5 km with good line of sight.
- Cheapest UniFi-ecosystem PtP
- Surge protectors included
- Good gain for the price
- Older chipset than NanoBeam
- Single-chain radio
- Band
- 5 GHz
- Gain
- 23 dBi
- Range
- Up to 5 km
- PoE
- 24V passive (included)

Plug-and-play (~$599 for the pair): UBB-XG 10 Gbps Bridge
The premium, zero-config option. Pre-paired out of the box — mount them, aim them, plug them in, done. No airOS, no channel hunting, no SSID setup. 10 Gbps throughput over 60 GHz. The tradeoff: shorter distance limit (~500 m) and more sensitive to rain than 5 GHz radios. If you're under 500 m with clear line of sight and you just want it to work, this is the best experience.
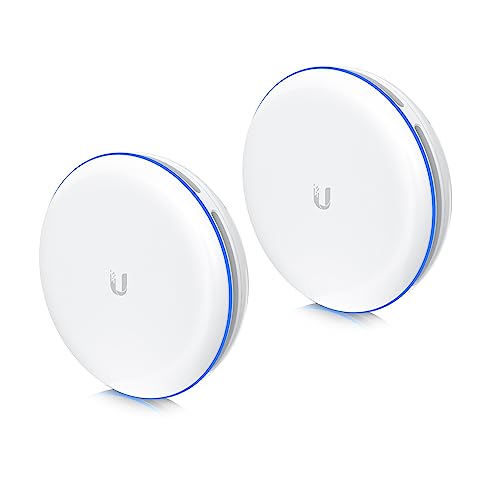
Ubiquiti UniFi UBB-XG Building-to-Building Bridge (2-Pack)
Plug-and-play 10 Gbps 60 GHz bridge. The easiest possible install.
The premium option. Both units are paired out of the box — mount, point them at each other, plug them in. No airOS config, no SSID, no channel hunting. 60 GHz delivers true 10 Gbps short-range links. UniFi-managed once online. Shorter distance limit (~500 m) and more sensitive to rain/obstructions than 5 GHz radios — strictly line-of-sight.
Best for: When you want it to 'just work' and distance is under 500 m.
- Zero configuration
- 10 Gbps throughput
- Integrates with UniFi controller
- Most expensive option
- Tighter distance limit than 5 GHz
- 60 GHz is more weather-sensitive
- Band
- 60 GHz
- Throughput
- Up to 10 Gbps
- Range
- ~500 m
- PoE
- 802.3bt
Alternative: TP-Link CPE510
Not UniFi, but genuinely good and cheaper per unit than the LiteBeam pair if you shop the right listing. Pharos OS is simpler than airOS for first-timers. Buy two.
TP-Link CPE510 (5 GHz, N300)
Budget 5 GHz PtP CPE. Cheaper than UniFi, slower, easier to set up.
5 GHz outdoor CPE with 13 dBi gain. Real-world throughput ~150 Mbps. Solid middle ground if you want 5 GHz but don't want to pay Ubiquiti prices. Sold per unit — buy two for a point-to-point. Pharos OS is more approachable than airOS for first-timers.
Best for: Budget 5 GHz links where UniFi is overkill or over-budget.
- Cheap per unit
- 5 GHz band
- Simple Pharos UI
- Buy two separately
- Older chipset
- Max ~150 Mbps real-world
- Band
- 5 GHz
- Gain
- 13 dBi
- Range
- Up to 15 km
- PoE
- Passive (included)

Point-to-point needs a matched pair. Mixing (say, a NanoStation on one end and a CPE510 on the other) can be made to work with careful tuning but has no upside and adds real headaches. Buy two of the same thing — or better, buy a 2-pack that ships pre-paired.
Router, switch, and AP (the UniFi side of the barn)
Once ethernet gets to the barn, you need to turn it back into Wi-Fi and give the barn more than one port. Defaulting to UniFi keeps everything in a single app.
Router (house side): UniFi Cloud Gateway Ultra
Skip this section if you're happy with your existing router — the PtP radio doesn't care what router you use. But if you're building a new network or want to run the same UniFi controller that manages your APs and switches, the Cloud Gateway Ultra is the default pick.
Ubiquiti UniFi Cloud Gateway Ultra (UCG-Ultra)
The default UniFi router. Small, silent, runs the whole network.
Full UniFi OS router: firewall, VLANs, VPN, IDS/IPS, and a built-in UniFi Network controller that adopts all your UniFi APs, switches, and PtP radios. 2.5 Gbps WAN, gigabit LAN. For most home-plus-outbuilding networks this is the right brain.
Best for: Home networks with a handful of UniFi APs and switches across one or more buildings.
- Runs the UniFi controller locally — no separate device needed
- Fanless, silent
- Full IDS/IPS and VPN
- No built-in Wi-Fi (pair with a U6 Lite)
- No PoE output
- WAN
- 1x 2.5 GbE
- LAN
- 4x 1 GbE
- Throughput
- ~10 Gbps routing

Switch (barn side): UniFi Switch Lite 16 PoE — or Flex Mini
In the barn, the ethernet cable from the PtP radio goes into a switch. If you only need a couple of extra ports, the Flex Mini is $29 and credit-card sized.
Ubiquiti UniFi Switch Flex Mini (USW-Flex-Mini)
5-port managed gigabit switch the size of a credit card.
Tiny, cheap, managed. Ideal for the destination end of a PtP link when you just need to split one ethernet drop into a couple of devices (AP + camera + NVR). Powered by USB-C or PoE input. Runs under UniFi Network.
Best for: Small destination building where you only need 2–4 extra ports.
- Tiny and cheap
- Managed under UniFi
- USB-C or PoE powered
- Only 5 ports
- No PoE output
- Ports
- 5x GbE
- Power
- PoE input or USB-C
- Mgmt
- UniFi

If the barn has cameras, multiple APs, or a handful of wired devices, use a PoE switch so you don't need separate injectors for each powered device:
Ubiquiti UniFi Switch Lite 16 PoE (USW-Lite-16-PoE)
16-port managed switch with 8 PoE+ ports. Barn-scale workhorse.
16 gigabit ports, 8 of them PoE+ (802.3at) up to 45 W total. Powers APs, cameras, and another PtP radio without needing separate injectors. Silent, wall-mountable, managed via UniFi. The default switch for any barn/outbuilding that needs more than a handful of ports.
Best for: Barn, shop, or ADU with several PoE devices.
- 8 PoE+ ports in a silent box
- Managed under UniFi with your router
- 45 W PoE budget
- Total PoE budget is modest — not for heavy cameras/APs everywhere
- Ports
- 16x GbE (8x PoE+)
- PoE budget
- 45 W
- Mgmt
- UniFi

Barn Wi-Fi: UniFi U6 Lite
Plug this into the PoE switch (or use a PoE injector if your switch isn't PoE) and give it the same SSID and password as your house Wi-Fi — devices will roam between house and barn automatically.
Ubiquiti UniFi 6 Lite Access Point (U6-Lite)
Default UniFi AP for inside the barn.
Standard 802.3af PoE Wi-Fi 6 access point. Once your bridge brings ethernet into the barn, plug this into a PoE switch or injector and you have fast Wi-Fi over the whole building. Manage via any UniFi controller (Cloud Gateway, UDR, Self-Hosted).
Best for: Indoor Wi-Fi coverage in the destination building.
- Wi-Fi 6
- Standard 802.3af PoE
- UniFi controller (free) for config
- Not outdoor-rated
- PoE injector sold separately
- Wi-Fi
- Wi-Fi 6 (AX)
- PoE
- 802.3af
- Ports
- 1x GbE

If you also want Wi-Fi outside the barn — paddock, riding ring, driveway — add an outdoor AP. TP-Link EAP610-Outdoor is the best value here; managed separately from UniFi via Omada, but it'll happily coexist on the network:
TP-Link Omada EAP610-Outdoor Wi-Fi 6 AP
Weatherproof AP for outdoor barn / pasture Wi-Fi.
IP68-rated outdoor Wi-Fi 6 AP. Use this if you need coverage in and around the barn — paddock, riding ring, driveway. Omada controller (cloud or self-hosted) or standalone. Works fine alongside UniFi gear on the network, just managed separately.
Best for: Outdoor Wi-Fi coverage outside the destination building.
- IP68 outdoor rated
- Wi-Fi 6 AX1800
- PoE powered
- Managed separately from UniFi gear
- PoE injector usually separate
- Wi-Fi
- Wi-Fi 6 (AX1800)
- PoE
- 802.3at
- Rating
- IP68

PoE injector (if you don't have a PoE switch)
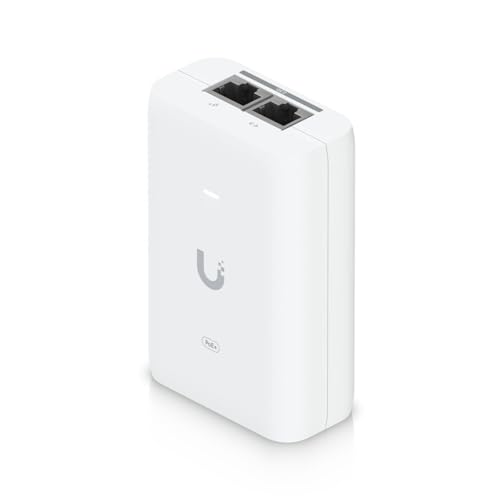
Ubiquiti PoE+ Adapter 30 W (UACC-POE+-2.5G)
Default UniFi PoE+ injector. 2.5 GbE, 30 W, Wi-Fi 6-ready.
Single-port 802.3at PoE+ injector. 2.5 Gbps data rate matches newer UniFi APs. Use it to power a U6 Lite/Pro, a camera, or an outdoor AP when you don't have a PoE switch.
Best for: Powering a single UniFi AP or camera where no PoE switch exists.
- 2.5 Gbps data rate
- 802.3at standard PoE+
- Compact
- Separate wall-wart (not in the box)
- Standard
- 802.3at
- Power
- 30 W
- Data
- 2.5 GbE
The non-negotiables: cable and surge protection
Tupavco TP302 Ethernet Surge Protector (2-Pack)
Cheap insurance against lightning frying your radio and router.
Install one of these on each end of any outdoor cable run, grounded to your building's ground system. Does not stop a direct strike, but eats the induced surges that are much more common. 2-pack covers a single PtP install.
Best for: Any outdoor radio. Non-negotiable for rural lightning-prone areas.
- Gigabit + PoE++
- 2-pack covers both ends
- Mounting flange + ground lug
- Only works if properly grounded

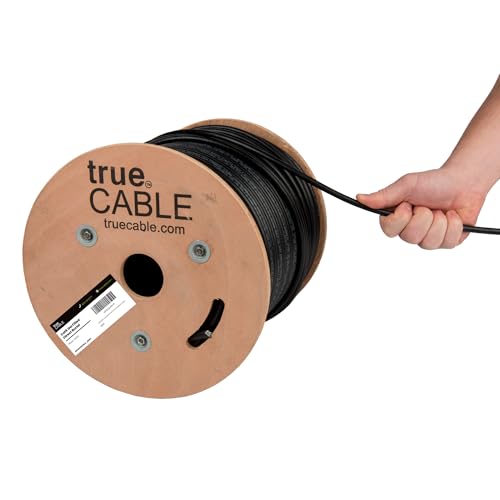
trueCABLE Cat6 Direct-Burial Bulk Ethernet, Gel-Filled, 500 ft
UV-resistant, gel-filled ethernet for outdoor runs and underground conduit.
Use outdoor-rated cable for anything that leaves the house — even if it's only running up the wall to a radio on the eaves. Gel-filled / direct-burial rating is required for unprotected underground runs. 500 ft spool is the right size for most home installs.
Best for: Any cable run exposed to sun, weather, or underground conduit.
- UV + moisture resistant
- Gel-filled for direct burial
- 23 AWG solid copper
- PoE++ rated
- Stiffer than indoor cable
- Terminations take practice
- Rating
- Cat6 Direct Burial
- Length
- 500 ft
- AWG
- 23 solid bare copper
Install: step by step
1. Pick your mounting points
Walk outside and look at the two buildings. You want:
- A spot on the house that sees the barn. Eave, soffit, chimney, or a short mast on the roof.
- A spot on the barn that sees the house. Usually the peak of the gable facing the house, or a mast above the ridge.
Stand where each radio will mount and look toward the other building. If you can't see the other mounting point clearly with your eyes, the radios won't see it either. Tree branches that are bare in winter will be a solid obstruction in summer — plan for leaves-on.
For runs over ~500 ft, mount as high as practical. A few extra feet of height is the cheapest way to buy yourself signal margin.
2. Plan the cable runs
Each radio needs one outdoor-rated Cat6 cable running back into the building to where the PoE injector (or PoE switch) lives. Keep the outdoor run as short as you can — get inside, then run indoor-rated cable the rest of the way.
Rules of thumb:
- Ethernet has a hard limit of 328 ft (100 m) from radio to switch. Past that, you need another switch or a repeater.
- Use outdoor-rated, UV-resistant cable outdoors. Indoor cable will crack in a year of sun.
- Direct-burial (gel-filled) cable for unprotected underground runs. Otherwise, use conduit.
- Drip-loop the cable before it enters the building so water runs off instead of tracking in.
3. Install surge protectors
This is non-negotiable if you live anywhere with lightning. Mount a surge protector where the cable enters each building, and ground it to your building's ground system. The surge protector does nothing if it isn't grounded.
4. Mount and terminate
Mount the radios. Run the cable. Terminate the ends — outdoor connectors have rubber boots; get them on the cable before you crimp. Seal the RJ45 with the weatherproof boot that came with the radio.
5. Configure the link
At this point you have two radios wired up, powered, and on the network but not talking to each other. On the UBB-XG, skip this step entirely — it's pre-paired. For the NanoStation / NanoBeam / LiteBeam:
- Plug each radio into your laptop one at a time, set an admin password, update firmware, and set a static IP on the same subnet as your home network (e.g. 192.168.1.2 and 192.168.1.3).
- On the barn radio, set mode to Access Point with WDS enabled. Pick a 5 GHz channel with clean airtime (use the Site Survey tool — pick the quietest channel).
- Give the barn radio an SSID and WPA2 password. These are just for the bridge itself — nobody else will ever see this SSID.
- On the house radio, set mode to Station with WDS enabled. Point it at the barn's SSID and enter the password.
- Verify the link comes up. You should see an RSSI of -65 dBm or better for a solid link. -50 to -60 is great. -75 or worse means aiming problems or obstructions.
(The flow is the same on TP-Link Pharos, just different menu labels.)
6. Aim
Now the fiddly part. If the radios have decent signal at this point, great. If they don't, aim:
- Log in to the station (house) radio.
- Open the signal meter. Most radios have an audible/visual alignment tool.
- Loosen the mount bracket slightly so you can pan the radio.
- Pan slowly. Watch the signal. Tighten when the reading peaks.
- Repeat on the AP (barn) radio.
For the NanoStation Loco you usually get within 3–5 dB just by eyeballing it. For the NanoBeam and LiteBeam you will need the alignment tool — their beamwidth is narrow enough that "close enough" isn't.
Put one phone on FaceTime/video with someone at the other end. They call out the dB number while you pan. Saves a ton of trips up and down ladders.
7. Put the barn network on your home network
The house radio's ethernet plugs into a LAN port on your home router. The barn radio's ethernet plugs into the uplink of a small switch, or directly into the barn Wi-Fi access point.
Do not plug the house radio into your router's WAN port — you're not adding another internet connection, you're extending the LAN you already have.
8. Set up barn Wi-Fi
Plug the U6 Lite into the switch or PoE injector. Adopt it in the UniFi app. Give it the same SSID and password as your house Wi-Fi so devices roam automatically. Turn off your old mesh node in the barn — you don't need it anymore, and it will just fight with the real AP.
What good looks like
Once the install is done, you should see:
- Throughput at the barn: within 10–20% of what you get in the house (tested wired to wired).
- Ping from a barn device to a house device: single-digit milliseconds.
- Bridge signal (RSSI): -65 dBm or better, stable over days.
- No drops when the barn door opens, when cars drive past, or when it rains (light rain). Snow and heavy rain can knock 5 dB off the link — that's why you want margin.
Troubleshooting
Link comes up but speeds are terrible.
Almost always a channel / interference problem. Run a Site Survey on both radios and move to a
quieter channel. 5 GHz is crowded in suburbia; try DFS channels (if your radio supports them) for a
dramatic improvement.
Link is unstable in bad weather.
You're on the edge of your signal budget. Either aim better, raise one end, or upgrade from
NanoStation to NanoBeam.
One radio won't get an IP / won't respond.
Nine times out of ten, PoE. Check the injector is the right voltage (24V passive for Ubiquiti
airMAX — plugging in a random 48V PoE switch will brick the radio). Check pinout on your crimped
ends.
Works when it's cool, drops when it's hot.
Could be a bad connector (thermal cycling on marginal crimps), or could be the radio itself if it's
mounted in full sun on a black wall. Shade the radio if you can.
Can't see the other building because of trees.
You can sometimes get away with a little foliage, especially in winter. You cannot get away with a
whole tree. Options: raise one or both radios above the tree line, prune, or go with a solution
that doesn't need line of sight (MoCA over existing coax, or buried fiber).
Cost summary
| Tier | Parts | Approx total |
|---|---|---|
| Budget UniFi | LiteBeam 2-pack (w/ surge), U6 Lite, Flex Mini, cable, PoE injector | ~$330 |
| Standard UniFi | NanoStation Loco 2-pack, U6 Lite, Flex Mini, 2× surge, cable, PoE injector | ~$400 |
| Step-up UniFi | NanoBeam 2-pack, U6 Lite, Lite 16 PoE switch, 2× surge, cable | ~$580 |
| Plug-and-play | UBB-XG 2-pack, U6 Lite, Flex Mini, cable | ~$830 |
| Budget non-UniFi | 2× CPE510, U6 Lite, 2× surge, cable, injector | ~$280 |
Add ~$130 if you also want outdoor Wi-Fi around the barn (EAP610 Outdoor).
Frequently asked questions
Will this work through the side of my metal-roofed barn?
Signal has to get to the radio, not through the building. Mount the barn radio on the outside of
the barn, facing the house. The ethernet cable goes through the wall.
How long does a PtP install last?
Ubiquiti radios in normal weather will run 5–8 years. The two weak points are the cable
terminations (UV, weather, chewing rodents) and the surge protector after a nearby strike. Both
are cheap to replace.
Can I have a third building?
Yes. Either add a second point-to-point link from the house to building C (two more radios), or
switch to a point-to-multipoint setup where the house radio is a sector antenna and the outbuildings
each have a station radio aimed at it. Point-to-multipoint is a different article.
Do I need a static IP from my ISP?
No. Point-to-point is just a LAN extension. Your ISP doesn't know or care that you've added a
wireless bridge to your own network.
Questions, or found something that's out of date? Every guide on this site improves when readers push back. Contact details are on the site footer.
Complete gear list
Everything mentioned in this guide, in one place.
Ubiquiti NanoStation 5AC Loco (NS-5ACL), 2-Pack
The default UniFi point-to-point pick. One box, both ends.
The most-installed outdoor PtP radio in the world. Two of them create a dedicated wireless bridge between buildings. Small, weatherproof, 24V passive PoE. Real-world throughput ~300–450 Mbps with clear line of sight. The 2-pack ships with both ends, mounts, and injectors.
Best for: Most house-to-barn / house-to-shop installs under 1500 ft.
- Proven, huge install base, tons of community support
- airMAX config is well-documented
- Both units + mounts + PoE injectors in one box
- Requires clear line of sight
- 24V passive PoE (not 802.3af)
- Band
- 5 GHz
- Gain
- 13 dBi
- Range
- Up to 1.5 km
- PoE
- 24V passive (included)
Ubiquiti NanoBeam 5AC Gen2 (NBE-5AC-Gen2), 2-Pack
Step up when you need more reach or cleaner signal.
Dish-style airMAX radio with 19 dBi gain and a dedicated management radio. Noticeably better throughput and stability than the Loco at longer distances or in noisy RF environments. Same configuration workflow as the NanoStation.
Best for: Runs from 500 ft to ~3 miles, or anywhere with heavy Wi-Fi interference.
- Higher gain = more margin for rain/foliage
- Dedicated management radio
- Gigabit PoE port
- More expensive per pair
- Narrower beam — aiming matters more
- Band
- 5 GHz
- Gain
- 19 dBi
- Range
- Up to ~15 km
- PoE
- 24V passive (included)
Ubiquiti LiteBeam 5AC Gen2 (LBE-5AC-Gen2), 2-Pack w/ Surge Protectors
Cheapest legitimate UniFi PtP pair. Dish form factor, 23 dBi gain.
Entry-level airMAX dish radio. 23 dBi gain at a price below the NanoStation. Not as fast or as well-specced as the NanoBeam, but plenty for a home internet connection. This listing bundles 2 units and 2 Ubiquiti Ethernet Surge Protectors — the most cost-effective way to buy a complete UniFi PtP kit.
Best for: Budget UniFi install up to ~5 km with good line of sight.
- Cheapest UniFi-ecosystem PtP
- Surge protectors included
- Good gain for the price
- Older chipset than NanoBeam
- Single-chain radio
- Band
- 5 GHz
- Gain
- 23 dBi
- Range
- Up to 5 km
- PoE
- 24V passive (included)
Ubiquiti UniFi UBB-XG Building-to-Building Bridge (2-Pack)
Plug-and-play 10 Gbps 60 GHz bridge. The easiest possible install.
The premium option. Both units are paired out of the box — mount, point them at each other, plug them in. No airOS config, no SSID, no channel hunting. 60 GHz delivers true 10 Gbps short-range links. UniFi-managed once online. Shorter distance limit (~500 m) and more sensitive to rain/obstructions than 5 GHz radios — strictly line-of-sight.
Best for: When you want it to 'just work' and distance is under 500 m.
- Zero configuration
- 10 Gbps throughput
- Integrates with UniFi controller
- Most expensive option
- Tighter distance limit than 5 GHz
- 60 GHz is more weather-sensitive
- Band
- 60 GHz
- Throughput
- Up to 10 Gbps
- Range
- ~500 m
- PoE
- 802.3bt
TP-Link CPE510 (5 GHz, N300)
Budget 5 GHz PtP CPE. Cheaper than UniFi, slower, easier to set up.
5 GHz outdoor CPE with 13 dBi gain. Real-world throughput ~150 Mbps. Solid middle ground if you want 5 GHz but don't want to pay Ubiquiti prices. Sold per unit — buy two for a point-to-point. Pharos OS is more approachable than airOS for first-timers.
Best for: Budget 5 GHz links where UniFi is overkill or over-budget.
- Cheap per unit
- 5 GHz band
- Simple Pharos UI
- Buy two separately
- Older chipset
- Max ~150 Mbps real-world
- Band
- 5 GHz
- Gain
- 13 dBi
- Range
- Up to 15 km
- PoE
- Passive (included)
Ubiquiti UniFi Cloud Gateway Ultra (UCG-Ultra)
The default UniFi router. Small, silent, runs the whole network.
Full UniFi OS router: firewall, VLANs, VPN, IDS/IPS, and a built-in UniFi Network controller that adopts all your UniFi APs, switches, and PtP radios. 2.5 Gbps WAN, gigabit LAN. For most home-plus-outbuilding networks this is the right brain.
Best for: Home networks with a handful of UniFi APs and switches across one or more buildings.
- Runs the UniFi controller locally — no separate device needed
- Fanless, silent
- Full IDS/IPS and VPN
- No built-in Wi-Fi (pair with a U6 Lite)
- No PoE output
- WAN
- 1x 2.5 GbE
- LAN
- 4x 1 GbE
- Throughput
- ~10 Gbps routing
Ubiquiti UniFi Switch Lite 16 PoE (USW-Lite-16-PoE)
16-port managed switch with 8 PoE+ ports. Barn-scale workhorse.
16 gigabit ports, 8 of them PoE+ (802.3at) up to 45 W total. Powers APs, cameras, and another PtP radio without needing separate injectors. Silent, wall-mountable, managed via UniFi. The default switch for any barn/outbuilding that needs more than a handful of ports.
Best for: Barn, shop, or ADU with several PoE devices.
- 8 PoE+ ports in a silent box
- Managed under UniFi with your router
- 45 W PoE budget
- Total PoE budget is modest — not for heavy cameras/APs everywhere
- Ports
- 16x GbE (8x PoE+)
- PoE budget
- 45 W
- Mgmt
- UniFi
Ubiquiti UniFi Switch Flex Mini (USW-Flex-Mini)
5-port managed gigabit switch the size of a credit card.
Tiny, cheap, managed. Ideal for the destination end of a PtP link when you just need to split one ethernet drop into a couple of devices (AP + camera + NVR). Powered by USB-C or PoE input. Runs under UniFi Network.
Best for: Small destination building where you only need 2–4 extra ports.
- Tiny and cheap
- Managed under UniFi
- USB-C or PoE powered
- Only 5 ports
- No PoE output
- Ports
- 5x GbE
- Power
- PoE input or USB-C
- Mgmt
- UniFi
Ubiquiti UniFi 6 Lite Access Point (U6-Lite)
Default UniFi AP for inside the barn.
Standard 802.3af PoE Wi-Fi 6 access point. Once your bridge brings ethernet into the barn, plug this into a PoE switch or injector and you have fast Wi-Fi over the whole building. Manage via any UniFi controller (Cloud Gateway, UDR, Self-Hosted).
Best for: Indoor Wi-Fi coverage in the destination building.
- Wi-Fi 6
- Standard 802.3af PoE
- UniFi controller (free) for config
- Not outdoor-rated
- PoE injector sold separately
- Wi-Fi
- Wi-Fi 6 (AX)
- PoE
- 802.3af
- Ports
- 1x GbE
TP-Link Omada EAP610-Outdoor Wi-Fi 6 AP
Weatherproof AP for outdoor barn / pasture Wi-Fi.
IP68-rated outdoor Wi-Fi 6 AP. Use this if you need coverage in and around the barn — paddock, riding ring, driveway. Omada controller (cloud or self-hosted) or standalone. Works fine alongside UniFi gear on the network, just managed separately.
Best for: Outdoor Wi-Fi coverage outside the destination building.
- IP68 outdoor rated
- Wi-Fi 6 AX1800
- PoE powered
- Managed separately from UniFi gear
- PoE injector usually separate
- Wi-Fi
- Wi-Fi 6 (AX1800)
- PoE
- 802.3at
- Rating
- IP68
Ubiquiti PoE+ Adapter 30 W (UACC-POE+-2.5G)
Default UniFi PoE+ injector. 2.5 GbE, 30 W, Wi-Fi 6-ready.
Single-port 802.3at PoE+ injector. 2.5 Gbps data rate matches newer UniFi APs. Use it to power a U6 Lite/Pro, a camera, or an outdoor AP when you don't have a PoE switch.
Best for: Powering a single UniFi AP or camera where no PoE switch exists.
- 2.5 Gbps data rate
- 802.3at standard PoE+
- Compact
- Separate wall-wart (not in the box)
- Standard
- 802.3at
- Power
- 30 W
- Data
- 2.5 GbE
Tupavco TP302 Ethernet Surge Protector (2-Pack)
Cheap insurance against lightning frying your radio and router.
Install one of these on each end of any outdoor cable run, grounded to your building's ground system. Does not stop a direct strike, but eats the induced surges that are much more common. 2-pack covers a single PtP install.
Best for: Any outdoor radio. Non-negotiable for rural lightning-prone areas.
- Gigabit + PoE++
- 2-pack covers both ends
- Mounting flange + ground lug
- Only works if properly grounded
trueCABLE Cat6 Direct-Burial Bulk Ethernet, Gel-Filled, 500 ft
UV-resistant, gel-filled ethernet for outdoor runs and underground conduit.
Use outdoor-rated cable for anything that leaves the house — even if it's only running up the wall to a radio on the eaves. Gel-filled / direct-burial rating is required for unprotected underground runs. 500 ft spool is the right size for most home installs.
Best for: Any cable run exposed to sun, weather, or underground conduit.
- UV + moisture resistant
- Gel-filled for direct burial
- 23 AWG solid copper
- PoE++ rated
- Stiffer than indoor cable
- Terminations take practice
- Rating
- Cat6 Direct Burial
- Length
- 500 ft
- AWG
- 23 solid bare copper